
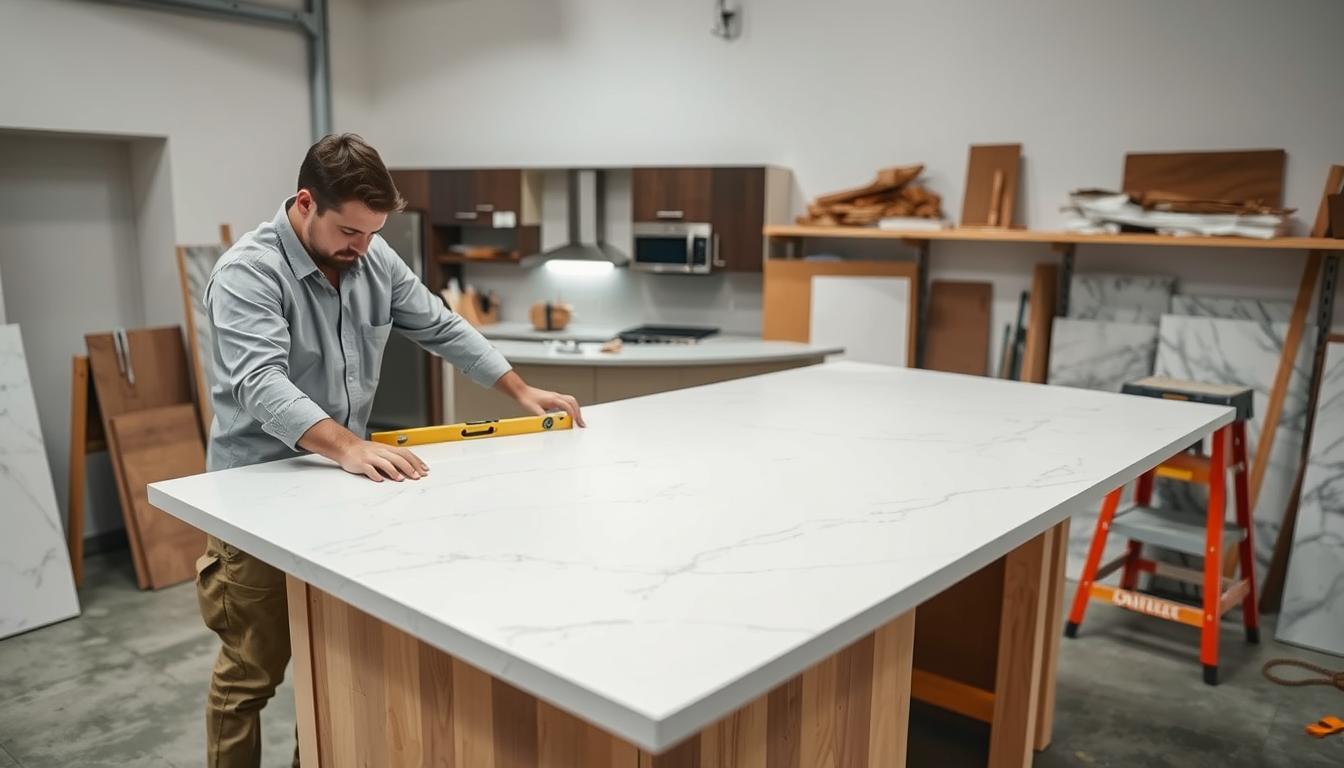
Did you know over 70% of kitchen renovation delays come from poor planning? Upgrading our homes can be complex, but fitting engineered stone surfaces is key. A successful quartz countertop installation needs careful planning and a clear timeline.
Knowing the quartz countertop installation process helps manage our expectations and keeps projects on track. By focusing on precision and safety, we can avoid costly mistakes. Every step, from measuring to finalizing edges, is crucial for a flawless result.
If you’re looking for a reliable quartz countertop installation near me, this guide is for you. We’ll cover the essential stages to make your home upgrade smooth and stress-free.
Key Takeaways
- Proper planning prevents common renovation delays and budget overruns.
- The project timeline relies on accurate measurements and professional coordination.
- Safety protocols are vital when handling heavy engineered stone slabs.
- A structured approach ensures a high-quality finish for your kitchen surfaces.
- Clear communication with your contractor leads to a more successful outcome.
Understanding Quartz Countertops
Engineered stone is a top choice for durable surfaces. Before starting your quartz countertop installation, it’s good to know what it is. It’s a key part of modern home design.
What Are Quartz Countertops?
Quartz countertops are made from crushed natural quartz, polymer resins, and pigments. They’re different from natural granite because they’re made, not mined. This makes them consistent.
This method avoids the unpredictable patterns and weak spots found in natural stone. Choosing quartz means you get a surface that’s both beautiful and strong for your kitchen or bathroom.
Benefits of Choosing Quartz
Homeowners love quartz for its non-porous nature. It doesn’t absorb liquids, so it’s resistant to stains, bacteria, and mold.
Quartz also stands up well to heat and moisture. It’s perfect for busy kitchens where spills and hot pans happen often. If you’re getting a quartz countertop installation, it will last for many years.
Comparing Quartz to Other Materials
It’s helpful to compare quartz to other countertop materials. The table below shows why many experts recommend engineered stone for homes and businesses.
| Feature | Quartz | Granite | Marble |
|---|---|---|---|
| Porosity | Non-porous | Porous | Highly Porous |
| Maintenance | Low | Moderate | High |
| Consistency | High | Low | Low |
| Durability | Excellent | Good | Fair |
The data shows quartz is a great choice for its low maintenance and high durability. Proper quartz countertop installation ensures a long-lasting finish for your home.
Preparing for Installation
We believe a perfect kitchen upgrade starts before the stone arrives. Proper preparation ensures your new surfaces fit perfectly. This step is key to a smooth quartz countertop installation process.
Measuring Your Space Accurately
When planning your layout, precision is crucial. Make sure all cabinets are installed and secure before templating. Cabinets need to be level to avoid issues like stress fractures.
Having appliances on-site during templating is wise. This approach prevents delays and ensures precise cutouts for sinks and stoves. Accurate measurements are essential for a successful quartz countertop installation.
Selecting the Right Quartz Style
Choosing the right aesthetic is as important as the technical setup. Consider how the quartz color and pattern will look with your cabinetry and lighting. Bring home samples to see how they look at different times.
Think about the finish too. Polished surfaces offer a classic shine, while honed options have a softer, matte look. Your choice should match your style and household needs.
Gathering Essential Tools
Having the right tools ready saves time and frustration. While professionals are often recommended, having a basic kit is helpful. Here’s a list of items to have ready for your quartz countertop installation project.
| Tool Category | Specific Item | Purpose |
|---|---|---|
| Measurement | Laser Level | Ensuring 1/4″ cabinet alignment |
| Safety | Heavy-duty Gloves | Protecting hands during handling |
| Preparation | Shims | Adjusting cabinet height |
| Cleaning | Microfiber Cloths | Dust removal before sealing |
Choosing the Right Installer
Finding the right experts for your kitchen remodel is key. The temptation to save money by doing it yourself is strong. But, working with engineered stone is different. Professional quartz countertop installers protect your investment and meet industry standards.
DIY vs. Professional Installation
Quartz slabs are heavy and need special tools for safe handling. A small mistake can damage the material. Most warranties require a certified professional for installation.
DIY can void warranties, leaving you at risk. Quartz installation services by experts keeps your warranty valid. They have the right tools and know-how to handle the stone.
Questions to Ask Potential Installers
When looking for quartz countertop installation companies, be ready with questions. Ask about their quartz experience and how they handle seams and edges.
Make sure they provide a detailed estimate. Also, check if they are licensed and insured. Clear communication helps avoid surprises on installation day.
Checking Credentials and Reviews
Before making a choice, check the installer’s reputation. Look for testimonials and past projects. The best quartz countertop installers will show their work.
Look for certifications from major quartz makers. A good company will provide references or examples of their work. These steps ensure your kitchen surfaces are installed right.
The Installation Process
Understanding the quartz countertop installation process makes us more confident in our home updates. Most jobs take 4 to 8 hours, based on the layout and material. With quartz installation services, we get precise and careful work.
Step-by-Step Overview of Installation
The day starts with removing old countertops and getting the cabinets ready. Our team checks if the cabinets are level before fitting the quartz. This step ensures the slabs fit perfectly against walls and fixtures.
After confirming the fit, they apply special adhesive to the cabinets. The slabs are then placed and secured for a strong bond. The seams are filled with epoxy that matches the color, making it look seamless.
“Quality is not an act, it is a habit.”
Common Mistakes to Avoid
One big mistake is ignoring wall irregularities. If walls aren’t square, the quartz might need custom cuts. Using the wrong adhesive can also cause problems like shifting or cracking.
Don’t rush the leveling process. Uneven cabinets can stress the quartz, causing it to break. A solid foundation is as crucial as the quality of the stone.
Safety Precautions to Keep in Mind
Safety is our main concern with heavy tools and adhesives. Keep kids and pets away to avoid accidents with sharp edges or wet materials.
- Make sure the area is well-ventilated to avoid fume buildup.
- Clear paths for the crew to safely move heavy slabs.
- Move fragile items from nearby cabinets and drawers before work starts.
Ensuring a Perfect Fit
A perfect fit for your quartz surfaces is key to a top-notch renovation. We focus on the small details to make your kitchen stand out. This way, your investment stays beautiful for years.
Aligning the Countertops Properly
Getting a seamless look needs careful attention to slab alignment. Professional quartz countertop installers use special tools for precise fitting. This makes seams almost invisible.
We also match the adhesive color to your stone pattern. Once it cures, it creates a strong, beautiful bond. This makes your countertops look like one solid piece of stone.
The Importance of Leveling
Leveling is crucial to avoid future problems. If cabinets aren’t flat, the quartz can crack over time. We check each cabinet’s level before installing the stone for a stable base.
“Precision in the initial leveling phase is the single most important factor in preventing future cracks and ensuring the longevity of stone surfaces.”
Using shims and laser levels, the best quartz countertop installers ensure a flat surface. This stops water from pooling and makes sure appliances fit well. A level surface is key for both looks and function.
Checking for Gaps and Cracks
After setting the slabs, we inspect for gaps and cracks. A tight seal protects your cabinets from moisture. We fill these gaps with high-quality silicone for a clean finish.
The table below shows the difference between a quality and poor installation:
| Feature | Professional Standard | Common Amateur Error |
|---|---|---|
| Seam Visibility | Nearly invisible | Wide, noticeable lines |
| Surface Level | Perfectly flat | Sloping or uneven |
| Wall Gaps | Tight, sealed edges | Visible gaps requiring thick caulk |
| Adhesive Use | Color-matched | Excessive or mismatched |
We also check for hairline cracks that might have happened during transport. Finding these early lets us fix them right away. Our dedication to quality means your new countertops will look amazing and last long.
Sealing and Finishing Touches
Many homeowners are surprised to find that the final stage of a quartz project is simpler than they thought. Quartz is an engineered stone with a non-porous surface. This means it doesn’t need the sealing treatments that natural materials like granite or marble do.
Even though the slab itself is easy to maintain, the finishing touches are crucial for a professional look. We focus on these steps to keep your kitchen or bathroom safe from moisture and looking great.

Why Sealing Is Important
Even though quartz is resistant to liquids, the areas where it meets walls or sinks are still at risk. Using a high-quality sealant in these spots stops water from getting into your cabinets or structure.
Moisture protection is key. This sealant creates a watertight barrier. It prevents mold growth and structural damage that could harm your investment over time.
Recommended Sealants and Finishes
We suggest using 100% silicone sealant for all joints and backsplashes. Silicone stays flexible after it dries. This lets your home expand and contract without cracking.
Stay away from standard caulk, as it can become brittle and yellow. A clear or color-matched silicone gives a seamless, professional look that matches your quartz style.
How Often to Reseal Your Countertops
You never need to seal the actual quartz surface. It’s factory-finished and stays durable without extra coatings.
But, check the silicone beads around your sink and backsplash every year. If you see peeling or gaps, just remove the old silicone and apply new beads. This keeps your countertop protection up.
| Feature | Quartz Countertops | Natural Stone (Granite) |
|---|---|---|
| Surface Sealing | Not Required | Required Annually |
| Moisture Resistance | High (Non-porous) | Moderate (Porous) |
| Joint Maintenance | Silicone Required | Silicone Required |
| Cleaning Effort | Low | Moderate |
Post-Installation Care and Maintenance
After the quartz countertop installation process is done, keeping your investment safe is easy. These surfaces are simpler to care for than natural stone. By sticking to a routine, your kitchen will stay beautiful for years.
Daily Cleaning Tips for Quartz
Cleaning quartz is a breeze for homeowners. Just use mild soap and warm water every day. A soft cloth will keep it looking new.
Stay away from harsh chemicals and rough scrubbers to avoid damage. For tough spills, a gentle cleanser works well. Always rinse well to avoid soap buildup.
Avoiding Common Damage
Quartz is tough, but it’s not indestructible. Always use trivets for hot pans to avoid thermal shock. Also, use a cutting board to prevent scratches from knives.
- Never cut directly on the quartz surface.
- Use coasters under acidic drinks like lemon juice or wine.
- Wipe up spills immediately to prevent potential staining.
Long-Term Maintenance Strategies
Our long-term plan is to prevent damage, not fix it. Quartz doesn’t need sealing like granite does. This makes it a great choice for busy homes.
Deep clean once a month to get rid of hidden dirt. By following these steps, your countertops will stay in pristine condition for years.
| Maintenance Task | Frequency | Recommended Tool |
|---|---|---|
| Daily Wipe Down | Every Use | Soft Cloth & Soap |
| Deep Cleaning | Monthly | Non-Abrasive Cleaner |
| Heat Protection | Always | Trivets |
| Surface Cutting | Never | Cutting Board |
Cost Considerations
Starting your renovation budget is all about understanding the quartz installation cost. Home improvements are big deals, and knowing your budget helps the whole process. It makes everything smoother from the beginning to the end.
Knowing what affects prices helps us make smart choices. Whether we want something fancy or an affordable quartz countertop installation, clear prices are key.
Breakdown of Installation Costs
Our project’s total cost includes several parts. We need to think about the stone slabs, the cutting and polishing, and the skilled labor for a perfect fit.
Cutting and polishing the stone to fit our exact needs is part of the job. The cost of labor can change based on how complex the design is and who we hire.
Factors Affecting Pricing
Several things can change the quartz installation cost a lot. The size of the countertop and the design’s complexity are big factors.
Special edges like ogee or mitered need more work and special tools. Also, the number of cutouts for sinks, faucets, and cooktops adds to the labor time.
Budgeting for Your Project
Planning our renovation means expecting it to take 10 to 15 business days. Getting at least three quotes from quartz countertop installation companies helps us compare prices and services.
Finding an affordable quartz countertop installation doesn’t mean we have to give up quality. By knowing what costs what, we can get a beautiful result without breaking the bank.
| Cost Factor | Impact on Price | Budget Tip |
|---|---|---|
| Square Footage | High | Measure accurately to avoid waste. |
| Edge Profile | Medium | Choose standard edges for savings. |
| Cutouts | Medium | Limit complex sink configurations. |
| Labor Complexity | High | Compare multiple professional quotes. |
Troubleshooting Common Issues
Keeping your kitchen surfaces in top shape is key to a beautiful home. Even with good care, high-traffic areas can show minor wear.
Managing Surface Imperfections
Small chips or scratches can happen, even with the best care. Use special repair kits for engineered stone to fix these issues. This way, your affordable quartz countertop stays looking great.
Handling Stubborn Stains
Hard-to-remove marks usually need mild, non-abrasive cleaners. Stay away from harsh chemicals that can dull the finish or harm the resin. Regular cleaning keeps your countertops looking new without the need for costly fixes.
Knowing When to Seek Expert Help
For deep cracks or structural damage, a pro is needed. DIY fixes can void your warranty or damage the material. Always call a certified expert for big problems.
If you face ongoing issues, contact support teams. Taking care of your quartz installation and getting help when needed keeps your space beautiful and functional. Your family will love it.